
How To Keep Shooting—At 75 MPH
You’re in a car and on the move, itching to shoot what’s flashing by, but there’s a window and 75 mph between you and your fast-moving subjects. Grab your camera, and follow these tips.

And you might get some pretty memorable images, imperceptible now, indelible later—those details your eye missed at high speed, that your camera froze for you to enjoy when you’re back at your Mac. To be sure they’re the best images they can be, concentrate on just a few tips, shown in the scenarios that follow:
- Shoot at the highest resolution your camera offers
- Choose ISO 100 for less noise (grain)
- Select shutter-priority and the proper speed
- Pre-focus for exposure and sharpness
Scenario: It’s sundown in the Palo Duro Canyon (above, known locally as the Grand Canyon of Texas), and the disappearing light is kissing the colorful rock striations with pale washes of blues, pinks and golds. But the driver is intent on getting back to town before dark.
How to Shoot: Set up your camera first. If your flash is on Auto, or On, turn it off. Choose Camera Raw (or the highest resolution jpeg you can), with ISO 100 to guarantee the least noise (grain) later. Then select shutter-priority, and set it to 1/30th of a second, but not lower. There’s still enough light, and the driver is going slowly, so you’re gambling you can get a sharp, saturated image in that half-second.
Secure your camera with a wrist strap, or strap it around your neck. Lower the window and aim for the middle distance, but not at the light areas where it’s still bright. Pre-focus, then shoot with abandon, finger on that shutter release, as fast as you can, or use your burst mode if your card is large enough. Later, use Adobe Lightroom or a similar photo editor to pull the detail from the shadows and adjust exposure, as needed. With your ISO 100 setting, your image will be crisp enough to enlarge and print.
Tip: Choosing Camera Raw, with ISO 100, will guarantee you the least noise (grain) later, and a very fine print.
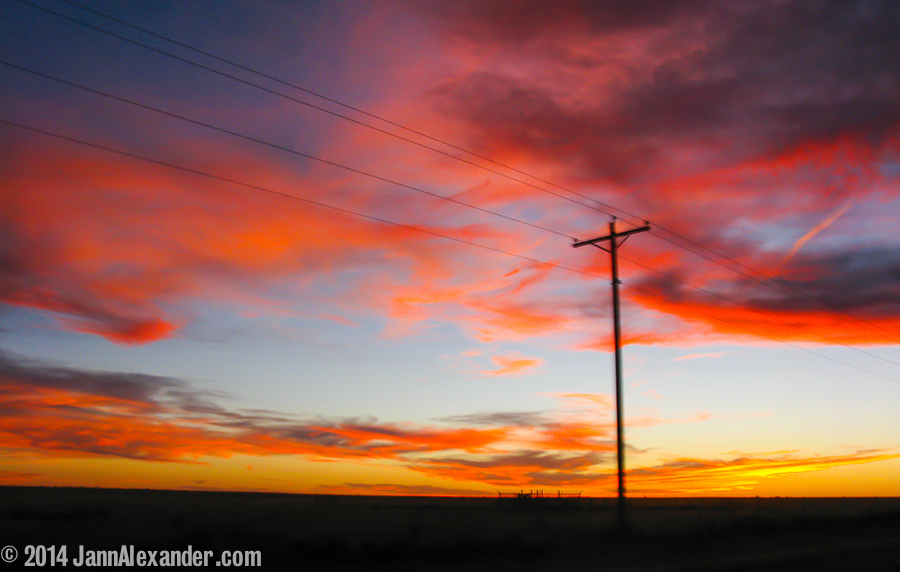
How to Shoot: You’ll want to prepare for a blast of air before you crank down the window, and strap your camera to your wrist, or around your neck. You’ll still want to turn off your flash, use Camera Raw (or the highest resolution jpeg you can), with ISO 100, and shutter-priority, but set it to 1/100th of a second—a bit faster, due to the car’s speed. And aim for the light (that’s the sky, in this case). That’s the only picture there is—nothing else is viewable in the near-dark, except the brightly-lit sunset.
Avoid aiming toward the very brightest part of the sky, so your light meter can do its averaging thing. The foreground and bonus telephone pole will paint a neat black silhouette when you get back to your Lightroom edits. This is another case where the more you shoot, the more choices you’ll have later. They’re all a gamble. But it’s a fun gamble.
Tip: Choosing shutter-priority, and pre-focusing before you shoot, will let you make the most of dwindling available light.
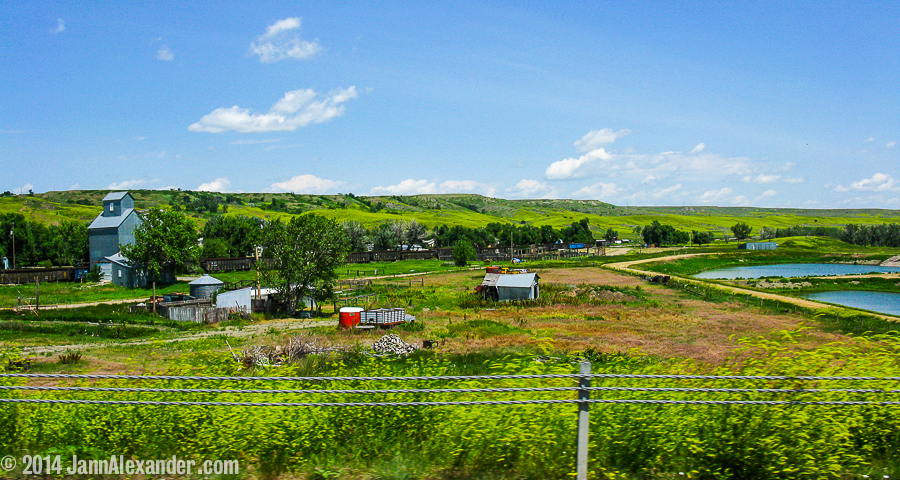
How to Shoot: Again, set up your secured camera before you roll down the window, and give warning to the passengers. Your settings are: no flash, Camera Raw or the highest-resolution jpeg, ISO 100, shutter-priority and 1/1600th of a second. You’ve got bright sun to illuminate your scene, but don’t focus on the blue sky or all that greenery. Pre-focus on the subjects (they could be rolls of hay, cows, or in this case, the farm buildings) to be sure they’re as sharp as can be.
Your pre-focus aim should be in the middle distance: The blue sky, being bright, will make your scene too dark if you aim there; and all the greenery, being darker, could cause the reverse issue. The image foreground can withstand soft-focus, even some movement, and since you can’t shoot without including the fence rail, make it a part of your composition, to establish depth. Crank the window back up when the bugs start getting sucked in.
Tip: Pre-focus on the most important area of your image to get the most even exposure and the sharpest view of it.
Scenario: You’re on one of the many Dallas, Texas freeways during rush hour, cruising at a good clip despite that, and the city skyline (though not usually an attractive one) is looking great with the sharp late-afternoon light etching highlights and patterns on the towers (above). But the only, and the nearest camera* you have handy is . . . on your iPhone.
*The nearest camera: Defined as the camera you have. Used in a sentence: “The best camera to use is the one you have with you.”
How to Shoot: Your choices on your iPhone are more limited. But that doesn’t mean you can’t get some very creative iPhoneography from it. To get the best images, you’ll want to choose the HDR option and turn the flash Off (not Auto). Prefocus is essential on your iPhone: tap the spot on the iPhone display that wants to be sharpest, and is the most evenly lit (or to put it another way, tap the spot you want to be sharp and well-exposed).
Then just shoot. Shoot, shoot, shoot. You can zoom in, zoom out, make panorama photos with ease, but you can’t control the speed or ISO or aperture; your iPhone will make all of those decisions for you. (My iPhone chose ISO 400, f/2.4 @ 1/20th sec; and it shows.) Still, the unexpected abstract delights your iPhone camera offers may just make it the most fun camera you’ll ever shoot with.
One final pro tip: Don’t be shooting while you’re driving. Let someone else take the wheel, so you can keep your eye on your shot, and live to shoot another day. ♣


Thank you for these ideas. Occasionally, I nab a photo that I just love BECAUSE it is out of focus, yet the emphasis becomes the value contrast, or the colors. But, this almost never happens, of course.
Glad to hear it might inspire you! Out of focus is the best for painting, I find. Thanks for your comments, Lynn.
Great tips, Jann. We’re often on the road and I have tried to take shots out the window as we speed by a site. But very few ever are presentable.
Thanks. Can’t wait to see what you come up with! But the unexpected results are the sweetest part.
Excellent tips! Thank You. Well, some years ago when I returned shooting photos from the World’s Biggest Snow Castle, I shot photos from the train which passed at the speed of 99 miles/hour. My evidence is here:
Happy blogging!
Thanks for visiting and sharing the photos made at 99mph! Zoom zoom!